
For this Tutorial I will be using Colorista Free from Red Giant Software together with Apple Final Cut Pro to create the CDL values and DaVinci Resolve from Black Magic Design to use as the final grade system.
This tutorial is for understanding the CDL format. Do NOT use this workflow in a production since Colorista Free can’t save the CDL values to a file. It would take more time to write down all the settings then to regrade the footage if you have many shots.
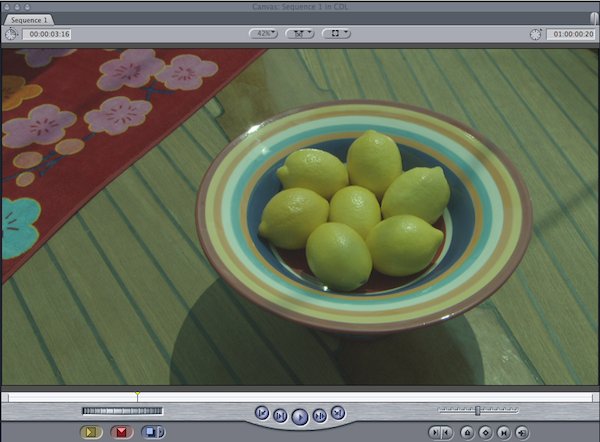
The shot I have chosen is shot on a Viper camera and it has a greenish cast. This is the way the Viper camera saves it’s footage to preserve the most color information.
I downloaded the Colorista Free plugin from Red Giant Software and installed it to my system, then opened FCP and put the shot on the timeline. I added the Colorista Free filter to it and started adjusting the balance of the shot. A good way is to open the Waveform monitor and look at the Parade for some help balancing the shot.

When I am happy with the look I need to get this over to the DaVinci Resolve. Resolve supports 2 different ways to import a CDL.
- CMX EDL: This has EDL contains Slope, Power, Offset and Saturation information within the comment area.
- CMX EDL + CCC XML file: This EDL contains links to a CCC XML file. The CCC XML file can contain various color correction looks, or even references.
FCP can export a CMX EDL, but not with CDL information, nor can it export a CCC or CDL XML. So we will have to build them ourselves. This might scare some of you, but I will take it in small steps and I am sure you will get the concept.

Let’s have a look at the CDL-tab of the Colorista Effect. As you can see, the values that I adjusted using the “balls” and “wheels” are converted to Slope, Power, Offset and Saturation (these are explained in the “Color Decision List -introduction” tutorial).
CMX EDL
We will start with the easiest format to read, CMX EDL. In the EDL the COMMENT field is used for CDL information.
*ASC_SOP (1.0 1.0 1.0)(0.0 0.0 0.0)(1.0 1.0 1.0)
*ASC_SAT 1.0
The first row describes the Slope, Offset and Power for each R, G and B.
The second row describes the saturation.

So what I will do is to export a CMX 3600 EDL from FCP and then add the CDL information by using a text editor, I use TextEdit. The original EDL look like this:

Now let’s add the CDL information by using the CDL values found in Colorista.

Now we are half way there. The next step is to conform this EDL in Resolve, then load the CDL values.
I created a new Project in Resolve, added the footage to the Media Pool and then loaded the EDL we just created. While conforming the CDL information we added to the EDL is not used.

I then use the ColorTrace(TM) CDL function, it will read the CDL information and apply it to the timeline.
A requester will ask me for the EDL and I select the same EDL again, then press Cancel when I am asked for the CDL file, we will use this in the next example.

In case the Automatic Grade Copy doesn’t work you can go to the Manual Grade Copy tab and drag the ASC thumbnail onto the Thumbnail in the bottom row. Select Done and go to the COLOR Screen. Now the shot has the look I created in FCP. The values are different since Resolve uses other default values then Colorista Free, but this is taken care of by the different programs.

CMX EDL + CCC XML
The second way to transfer CDL information is to use an EDL with pointers to correction settings in a XML file. Let’s open the EDL again, save a copy and remove the ASC_SOP and ASC_SAT rows. Instead we add the following
*ASC_CC_XML cc1234

Now we have to create a CCC XML, you can download this sample CCC file here.

The XML file is built with tags, where each tag starts with <tagname> and ends with </tagname>. In this example I added 2 ColorCorrection tags because I want to show that you can add many corrections in the same XML file. The second <ColorCorrection> tag has id=’cc1234′. This is the same id as I added to the EDL file with the *ASC_CC_XML row. So this is how the receiving program knows which Correction should be added to which EDL event.
Inside the <ColorCorrection> tag, you find a <SOPNode> tag, and inside that Slope, Offset and Power are located. I have copied the same values I used in the previous example to the second <ColorCorrection>. Saturation has it’s own tag <SatNode> and there you find Saturation.
In the first <Colorcorrection> there is no <SatNode>, which means that it’s not a required field. The reason is that the first version of the CDL format didn’t have a value for Saturation. To keep backwards compatibility the <SatNode> was created when Saturation was added to the CDL format.
There is also a <Description> tag that can be used to write a comment. It depends on the exporting software if it uses <Description> or not, it’s not a required tag.
Back in Resolve I delete the current Session and the Master Session, then load the new EDL and conform. Go to COLORTRACE CDL and select the EDL again. This time when the CCC requester pops up I select the “CDL_test.ccc” file and either use the automatic or manual grade copy to apply the settings. When I go to the COLOR screen I have the same look as in the previous example.
Start Finalyzing
Once the CDL information has been transferred to the Final Grading system you can start to work on perfecting the grade and add Secondaries etc. to get the final result. If the grading on a shot doesn’t work, well then just throw it away and start again or adjust it the way you want.
© 2011 Nikolai Waldman